NOTE: These instructions only work for Teracube 2e 1st batch (SN: 2020). They do not work for the 2nd batch yet (SN:2021). Read more here.
WARNING: Unlocking the Bootloader WILL PERFORM A FACTORY RESET on your phone. Please backup your data BEFORE PROCEED.
3rd party app - Magisk: This process requires a 3rd party app which is not controlled by Teracube. Proceed at your own risk. You have been warned.
WARNING: Teracube will not be responsible for any data theft/loss due to installing a 3rd party app (in this case magisk), running root, or giving elevated privileges to any apps.
Teracube phones are covered under hardware warranty even if rooted
If you’ve been following the threads regarding root, you’d have noticed that you can get root by patching your boot image. While this works, it’s far easier to do this from a custom recovery such as TWRP, and should help you install and manage ROMs and backups in the future.
Before we begin, please note the following:
- Always have a backup of your data when modifying your device.
Unlocking will erase your device! - Always have the stock firmware at hand, in case something goes wrong
- In case something does go wrong, don’t panic. This will be easy

That said, the process is not for the faint of heart. Please read all instructions carefully.
Ready? Let’s start.
Pre-requisites
- You will need a computer for this process
- Make sure you have android platform tools (adb and fastboot) installed along with drivers.
You can learn more about the same here. - (Optional but recommended), Remove lockscreen password. It seems there are still issues decrypting in TWRP with secure keyguard, I am looking into this.
Unlocking your device’s bootloader
Follow [ Advanced ] Unlock the Bootloader to unlock your bootloader.
You can then set up your device again and re-enable “USB Debugging” through “Developer Options”.
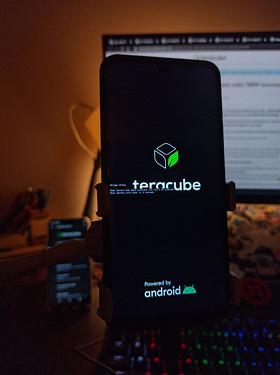
Message on boot-logo, indicating unlocked bootloader
Disabling AVB (Android verified boot)
**Q: Why is this needed?** - Click to show answer
A: Android verified boot is a security and safety feature, to ensure that the partitions are “trusted” and unmodified. While recovery is not verified by AVB, other partitions are, and the device will not pass the boot logo if any other AVB verified partitions are modified. For example: To boot with a mod such as Magisk, you need to disable AVB to get past the boot logo, since Magisk will modify the boot image. Sure, there are ways to preserve AVB even with modifications, but it’s far simpler to keep AVB disabled.
- Grab “vbmeta-2e-stock.img” from the “Downloads” section at the end of this post, and place it in your working directory
- Reboot to bootloader using
adb reboot bootloader - Execute the following:
fastboot --disable-verity --disable-verification flash vbmeta vbmeta-2e-stock.img
fastboot reboot
Note: The provided vbmeta.img is identical to the one in the stock firmware. If you ever need to disable AVB, you can just flash the vbmeta partition with the above flags 
Flash twrp recovery
- Grab “twrp-3.5.0_10-2-Teracube-2e.img” from the “Downloads” section at the end of this post, and place it in your working directory
- Reboot to bootloader using
adb reboot bootloader - Flash recovery:
fastboot flash recovery twrp-3.5.0_10-2-Teracube-2e.img
fastboot reboot
- Immediately after execution of above snippet finishes, hold power up to load the boot menu
- Follow the instructions to navigate and start “Recovery”
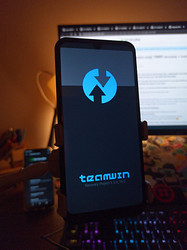
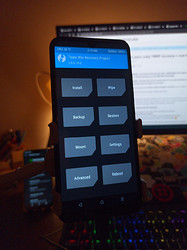
- Awesome! You are now running TWRP

Teracube 2e running TWRP recovery
Rooting with Magisk
Note: Never download mods like Magisk from external sources! John (topjohnwu) is the developer of Magisk, and his GitHub is the only official source for Magisk!
- Download the latest Magisk from topjohnwu’s GitHub. (Download Magisk.apk)
- Move
Magisk.apkto your working directory and make a copy namedapp-debug.zip - Execute:
adb reboot recovery
adb wait-for-device
adb push app-debug.zip /sdcard/
- On your device in TWRP, tap “Install” and select “app-debug.zip”, then swipe to install.
- Let Magisk do it’s magic, and reboot! If your device doesn’t boot, see troubleshooting below.
- Some have reported that on rebooting, the Magisk app does not launch. In case this happen to you, simply execute:
adb install app-debug.apk
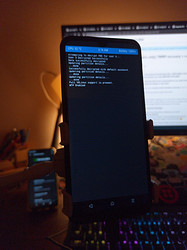
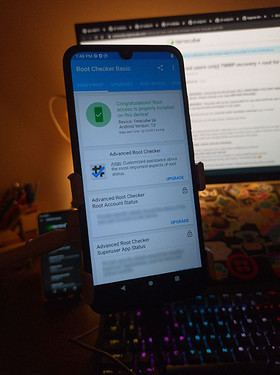
- Done! You should now be rooted

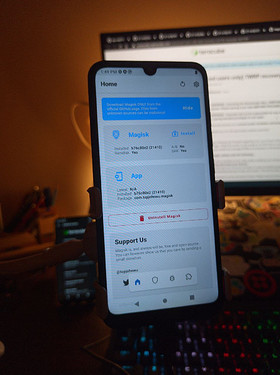
Device successfully rooted using Magisk flasher, through TWRP recovery
Troubleshooting
If your device does not boot after flashing Magisk, try the following:
- Boot to recovery
- Wipe > Format Data, type “yes”
- Reboot > Recovery
- Push Magisk’s zip again:
adb push app-debug.zip /sdcard/
- Install > app-debug.zip > Swipe to install
- Reboot system after install
- You should be able to boot now
If all else fails, please feel free to re-flash stock firmware by following this link, and let us know what you did and what happened. We’ll try our best to help you get rooted!
Downloads
- twrp-3.5.0_10-2-Teracube-2e.img
-
vbmeta-2e-stock.img
Note: Some users reported success using the vbmeta.img directly from the stock firmware, you can get that from here.
Sources

