[Advanced users only] TWRP recovery + root for Teracube 2e (1st batch, SN:2020)

NOTE: These instructions only work for Teracube 2e 1st batch (SN: 2020). They do not work for the 2nd batch yet (SN:2021). Read more here.

  1. WARNING: Unlocking the Bootloader WILL PERFORM A FACTORY RESET on your phone. Please backup your data BEFORE PROCEED.

  2. 3rd party app - Magisk: This process requires a 3rd party app which is not controlled by Teracube. Proceed at your own risk. You have been warned.

  3. WARNING: Teracube will not be responsible for any data theft/loss due to installing a 3rd party app (in this case magisk), running root, or giving elevated privileges to any apps.

  4. Teracube phones are covered under hardware warranty even if rooted

If you’ve been following the threads regarding root, you’d have noticed that you can get root by patching your boot image. While this works, it’s far easier to do this from a custom recovery such as TWRP, and should help you install and manage ROMs and backups in the future.

Before we begin, please note the following:

  1. Always have a backup of your data when modifying your device.
    Unlocking will erase your device!
  2. Always have the stock firmware at hand, in case something goes wrong
  3. In case something does go wrong, don’t panic. This will be easy :grinning_face_with_smiling_eyes:

That said, the process is not for the faint of heart. Please read all instructions carefully.

Ready? Let’s start.

Pre-requisites

  • You will need a computer for this process
  • Make sure you have android platform tools (adb and fastboot) installed along with drivers.
    You can learn more about the same here.
  • (Optional but recommended), Remove lockscreen password. It seems there are still issues decrypting in TWRP with secure keyguard, I am looking into this.

Unlocking your device’s bootloader
Follow [ Advanced ] Unlock the Bootloader to unlock your bootloader.
You can then set up your device again and re-enable “USB Debugging” through “Developer Options”.


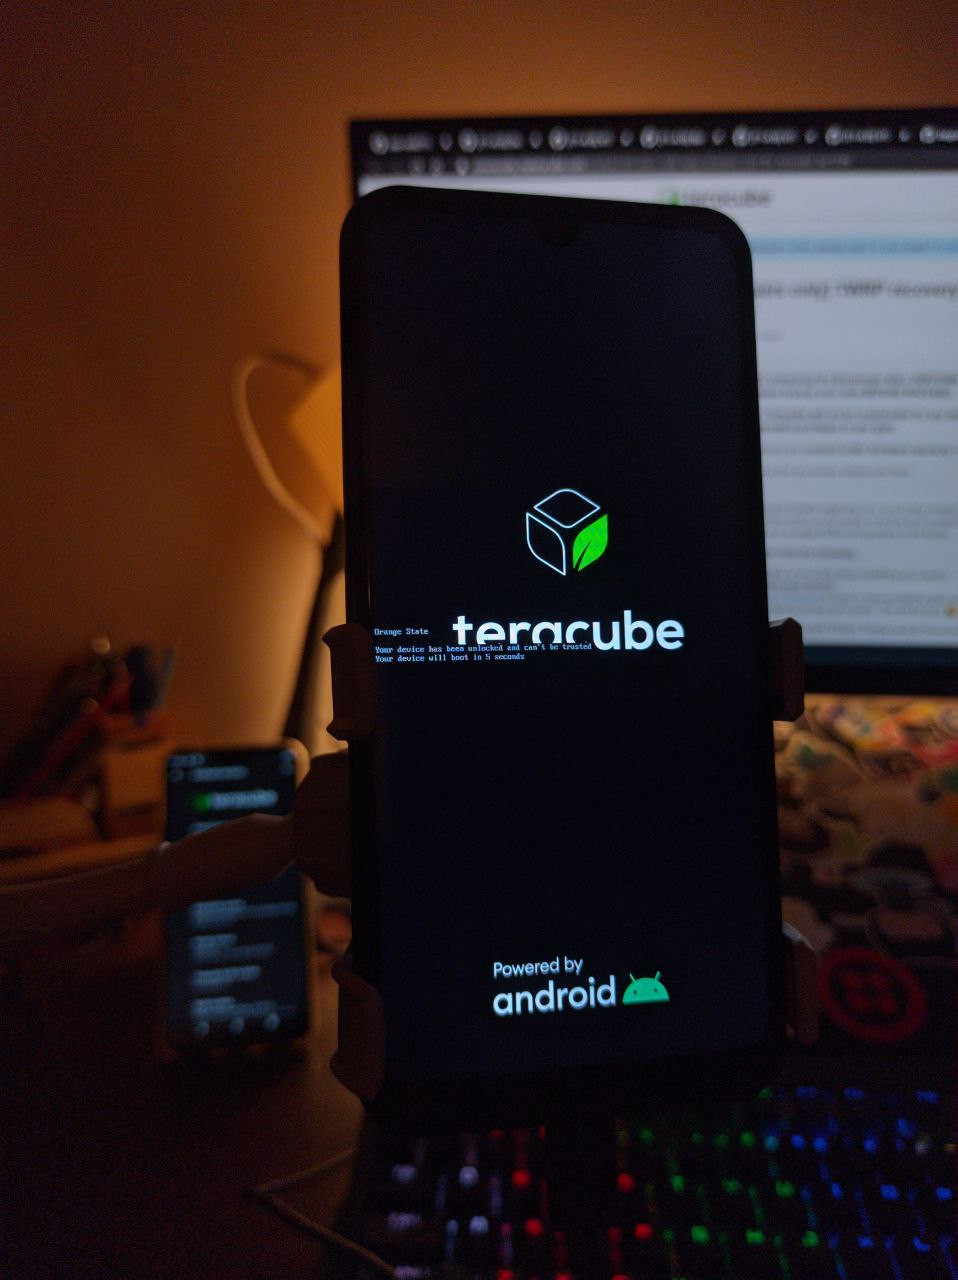
Message on boot-logo, indicating unlocked bootloader

Disabling AVB (Android verified boot)

**Q: Why is this needed?** - Click to show answer

A: Android verified boot is a security and safety feature, to ensure that the partitions are “trusted” and unmodified. While recovery is not verified by AVB, other partitions are, and the device will not pass the boot logo if any other AVB verified partitions are modified. For example: To boot with a mod such as Magisk, you need to disable AVB to get past the boot logo, since Magisk will modify the boot image. Sure, there are ways to preserve AVB even with modifications, but it’s far simpler to keep AVB disabled.

  1. Grab “vbmeta-2e-stock.img” from the “Downloads” section at the end of this post, and place it in your working directory
  2. Reboot to bootloader using adb reboot bootloader
  3. Execute the following:
fastboot --disable-verity --disable-verification flash vbmeta vbmeta-2e-stock.img
fastboot reboot

Note: The provided vbmeta.img is identical to the one in the stock firmware. If you ever need to disable AVB, you can just flash the vbmeta partition with the above flags :grinning_face_with_smiling_eyes:

Flash twrp recovery

  1. Grab “twrp-3.5.0_10-2-Teracube-2e.img” from the “Downloads” section at the end of this post, and place it in your working directory
  2. Reboot to bootloader using adb reboot bootloader
  3. Flash recovery:
fastboot flash recovery twrp-3.5.0_10-2-Teracube-2e.img
fastboot reboot
  1. Immediately after execution of above snippet finishes, hold power up to load the boot menu
  2. Follow the instructions to navigate and start “Recovery”
  3. Awesome! You are now running TWRP :partying_face:

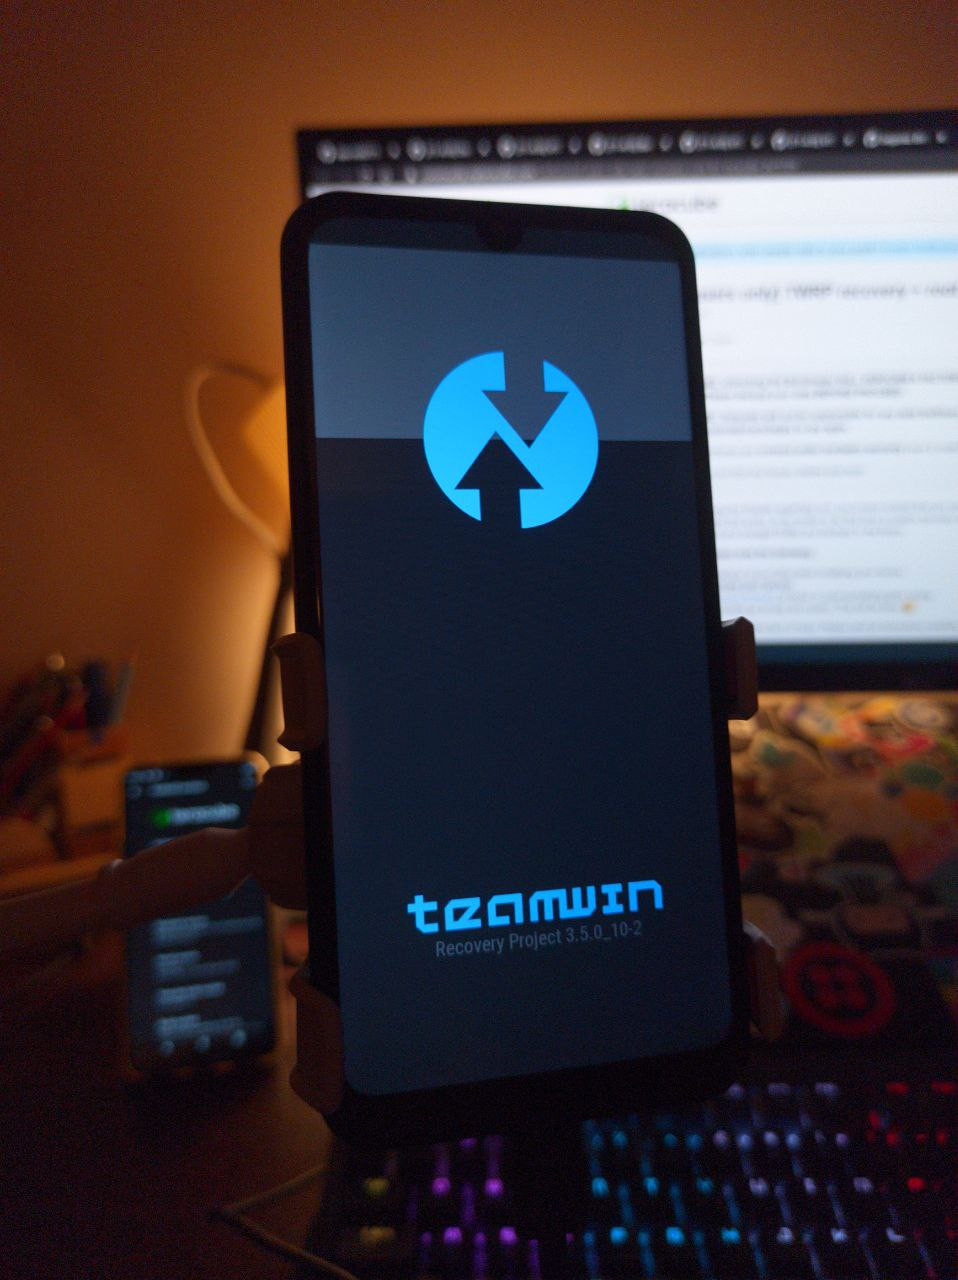
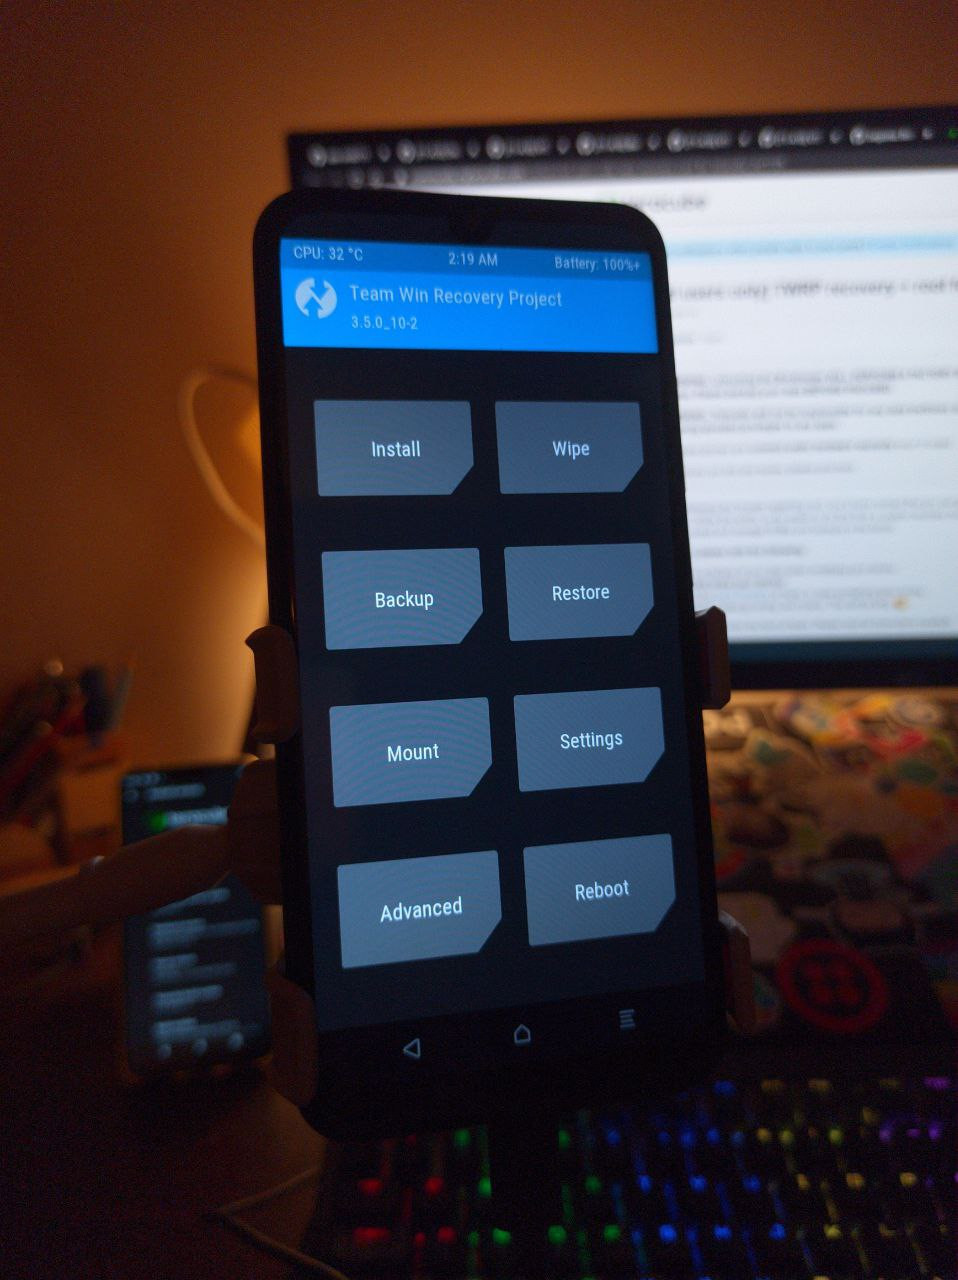
    Teracube 2e running TWRP recovery
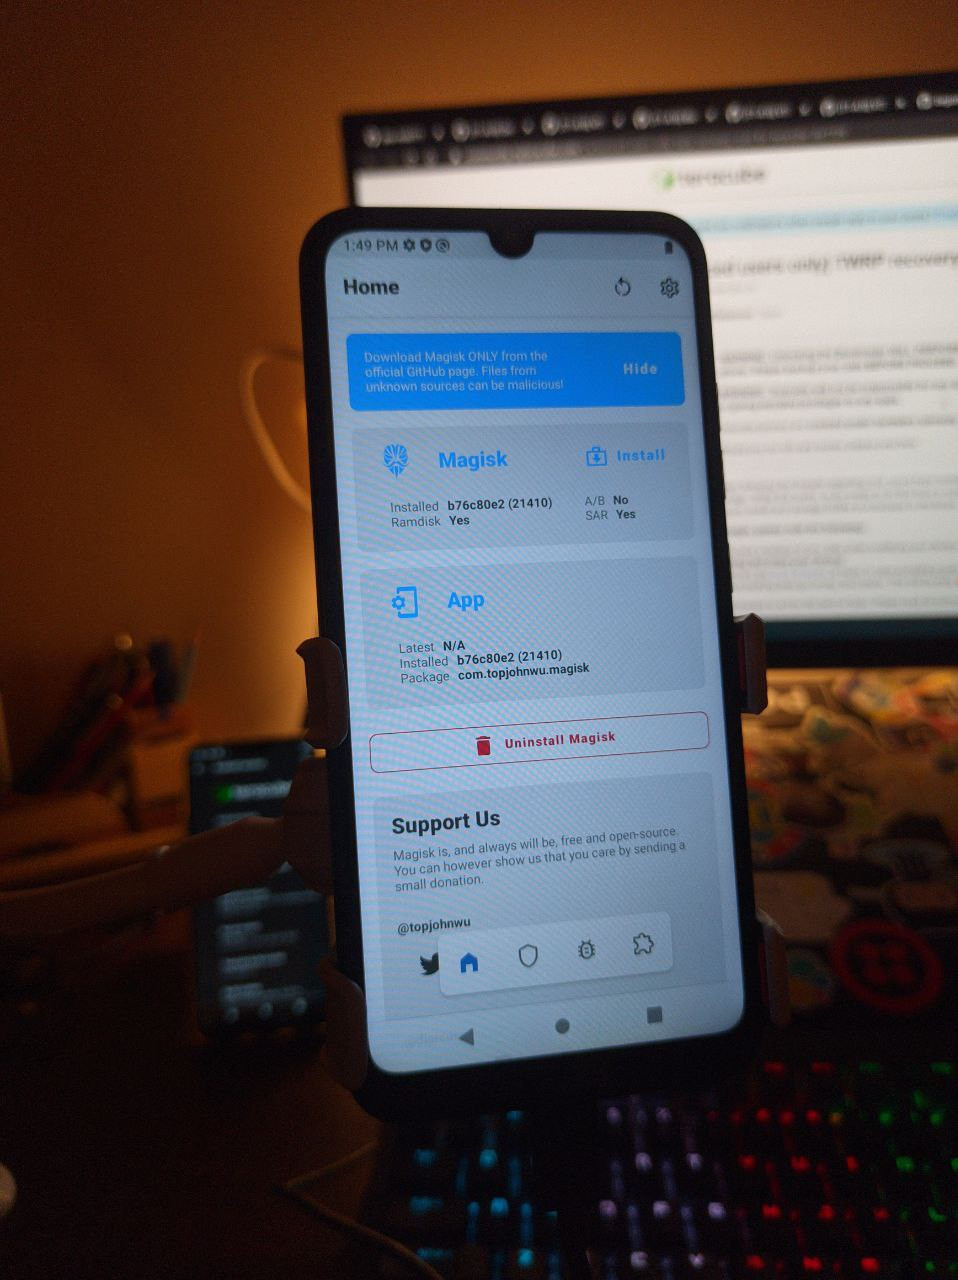
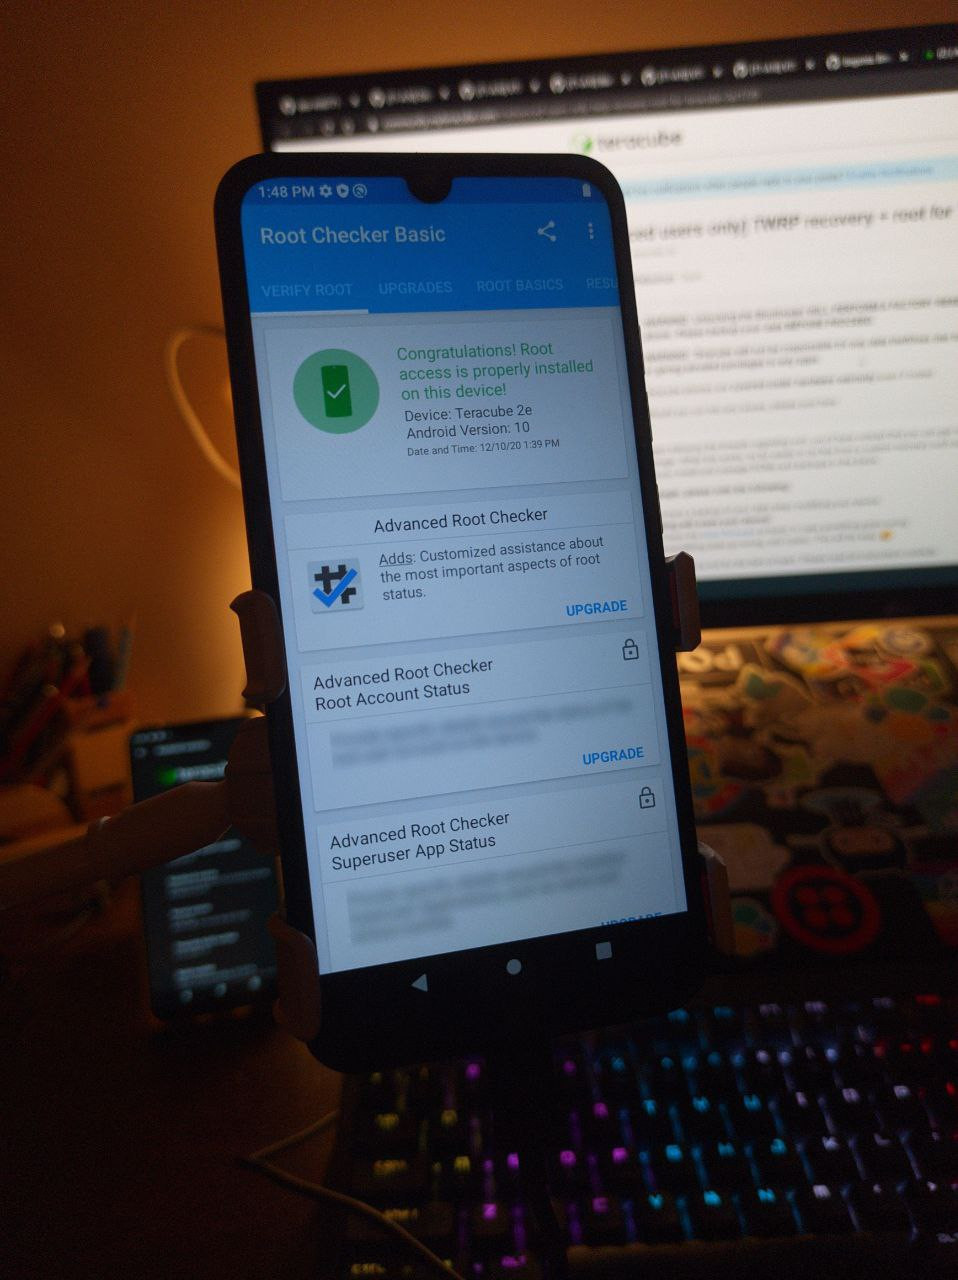
Rooting with Magisk
Note: Never download mods like Magisk from external sources! John (topjohnwu) is the developer of Magisk, and his GitHub is the only official source for Magisk!

  1. Download the latest Magisk from topjohnwu’s GitHub. (Download Magisk.apk)
  2. Move Magisk.apk to your working directory and make a copy named app-debug.zip
  3. Execute:
adb reboot recovery
adb wait-for-device
adb push app-debug.zip /sdcard/
  1. On your device in TWRP, tap “Install” and select “app-debug.zip”, then swipe to install.
  2. Let Magisk do it’s magic, and reboot! If your device doesn’t boot, see troubleshooting below.
  3. Some have reported that on rebooting, the Magisk app does not launch. In case this happen to you, simply execute:
adb install app-debug.apk
  1. Done! You should now be rooted :slight_smile:

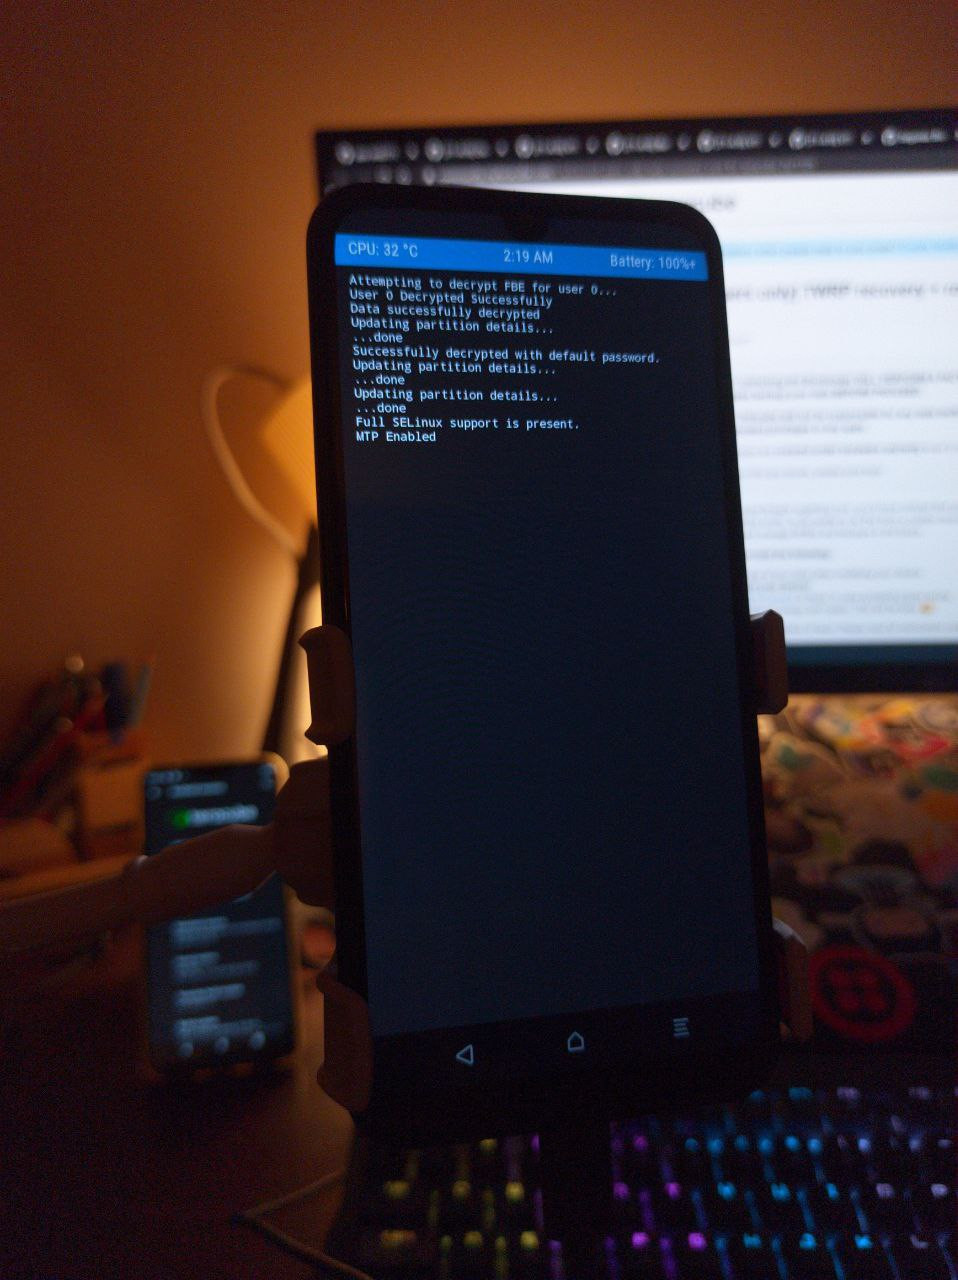
    Device successfully rooted using Magisk flasher, through TWRP recovery

Troubleshooting
If your device does not boot after flashing Magisk, try the following:

  1. Boot to recovery
  2. Wipe > Format Data, type “yes”
  3. Reboot > Recovery
  4. Push Magisk’s zip again:
adb push app-debug.zip /sdcard/
  1. Install > app-debug.zip > Swipe to install
  2. Reboot system after install
  3. You should be able to boot now

If all else fails, please feel free to re-flash stock firmware by following this link, and let us know what you did and what happened. We’ll try our best to help you get rooted!

Downloads

Sources

10 Likes

Does disabling AVB disable device encryption

It does not. AVB verifies integrity of non-user modifiable partitions, and implements ARB (Anti-rollback). Thus, of course if you were to modify the boot image to gain root, you would need to either make AVB verify your boot image somehow, update your vbmeta struct to reflect the new boot image, or disable AVB.
Device encryption comes from various vendor components, vold, and is enabled through fstab. (Look for mount flags on userdata).
You can learn more about AVB here, and here.
If you do wish to disable encryption, once rooted, you can try modifying fstab to not have the fileencryption flag on userdata.

2 Likes

Thanks for the info. I’'m going to take a look at your device tree to try to get TWRP working on the Teracube 1

2 Likes

Even after wiping data and factory reseting, I am unable to boot with vbmeta flashed with the specific flags. I don’t really have the resources to test though because my teracube is my daily driver. I narrowed it down to that because once I flashed vbmeta without flags, my phone was able to boot normally, but my phone was not able to boot when I flashed the magisk zip.
Edit: For a bit of clarification, after flashing vbmeta with the flags, I got a message saying my phone could not be booted because system files were corrupted. This was after a complete reflash.

Please make sure you’re using the latest fastboot binary available on Google’s platform-tools page. This will only happen with older fastboot binaries that do not support said flag. You should see a message like so when you do use the flags:
Rewriting vbmeta struct at offset: 0
If you don’t see this message, you know that your fastboot exec is at fault.

2 Likes

Hi Everyone! Thanks for this tutorial! Magisk keeps crashing for me. I wasn’t able to push the app-debug.zip to /sdcard/ . I get a message saying " remote couldn’t create file: Required key not available". In order to try to get around this I pushed it to /etc/ instead and installed it from that location using twrp. The install was successful, and Magisk shows up in my app drawer; however it doesn’t load and I get a message that it keeps crashing. I then tried to run adb install app-debug.apk. I got this message: “adb: failed to run abb_exec. Error: closed adb: retrieving the default device installation mode failed: closedPerforming Streamed Install”
To be clear I’m using powershell to issue these commands and I’m using .\adb before each one. I love this phone, but I can’t get photos through MMS because I need to edit my APNs. This is why I’m trying to root. Any suggestions you may have would be super appreciated. Cheers!

1 Like

Hey @ifbermeo! Welcome to the community.
That’s interesting, “Required key not available” usually indicates decryption failure. Could you show me the log of TWRP? (Just tap the third navigation button in TWRP, on the right). Also, did you have any password set on lock-screen?
The Magisk crash is easily fixed by installing the APK after flashing Magisk. And even if you do have a crashing app, you’re almost there! Your device is more-or-less rooted at this point. It’s possible that there may be an issue with either your adb binary, or even adb authorization in Android. Regardless, you can also just copy the app-debug.apk to your device’s storage and install it from a file manager.
I will play around and look through to see if there are issues with decryption on my end with different lockscreen password types.

Thanks!

First, I know nothing about rooting and the processes used to do it. The guide in this thread seems very complete, but I would like to know what the steps are doing along the way. Is there a novice readable reference that you can recommend to fill in the blanks?

1 Like

I was getting the same error, so I used the vbmeta in the stock firmware since @AgentFabulous said it was the same. Maybe the vbmeta-2e-stock.img has a problem. @AgentFabulous, please confirm.

To get the vbmeta.img from the stock firmware, just download and extract the files from the zip file in step 2 at the begging of the guide. The command would change to fastboot --disable-verity --disable-verification flash vbmeta vbmeta.img

1 Like

Hey Agent Fab, thanks so much for posting this guide. It’s refreshing to see a dev team so responsive and willing to help consumers use their devices to the fullest.
I have a problem: I’ve followed this guide a few times and have verifiably rooted my Teracube 2e using TWRP and Magisk. However, my problem (in brief; it would take quite a bit to explain exactly everything I went through) is that after rooting and connecting my phone to my network, the phone cannot reboot, and when I attempt to do so it will either boot loop on the Orange State screen or go to fastboot instead.
I’m using a Windows 10 PC and am following the guide to the letter. No abnormalities occur in the rooting process. My network is Google Fi; I’m aware that they’re not supported but since I connect to the network successfully every time I really don’t think that’s the issue. Any suggestions/more info I can provide?

1 Like

Did some more testing, seems like there are a couple of issues with secure keyguard and also some colors. Will look into it as soon as I get back to TWRP work. For now, you can push the file to /cache, or /tmp, or even remove your lockscreen password to decrypt with default_password. I will update the guide accordingly.


While I have tried to explain as best as I could, do feel free to ask anything you don’t understand. I’d be happy to help you understand and learn :grinning_face_with_smiling_eyes:


Very strange, both files are identical for me:
image image
However if that works for you, awesome! Perhaps someone with the same issue can fix it that way. I will add it to the guide.


Interesting, I don’t have any weird reboot issues. Could you try the following?:

  1. Reboot the device
  2. Let it loop on the boot logo (orange state screen), or better yet, have it reboot to fastboot by itself
  3. Once you feel the issues have happened as per your description, hold power up to load the boot menu
  4. Navigate to recovery
  5. Connect your phone to your PC, in a cmd/powershell/terminal, run:
adb pull /proc/last_kmsg
adb pull /sys/fs/pstore

Note: Booting into Android before pulling the log will replace the kmsg with Android’s messages when you reboot to recovery next, thus removing the required logs.
(As the name suggests, its the last kmsg/kernel-message log)
If you do boot into Android before you can get into recovery, do the following:

adb shell
su
cp /proc/last_kmsg /sdcard/
cp -r /sys/fs/pstore /sdcard/pstore
exit

adb pull /sdcard/last_kmsg
adb pull /sdcard/pstore

Explanation for anyone curious: You may read more about last_kmsg and pstore here and here. These are kernel logs and are not usually accessible to you, the user. However, with Magisk and TWRP, it’s possible to access these files.

This process will pull the last kernel messages to your current working directory. You can either DM this to me, or email us at devs@myteracube.com. Do remember to mention this thread/link your reply in the message.

3 Likes

Is there a way to root the 2e without flashing the system and resetting it?

Hello! I finished rooting, thank you for the guide! Just wanted to provide a few more data points. I also had the problem of the “vbmeta-2e-stock.img” not working properly, it was resolved by following @Ylvinzk instructions to use the strictly stock firmware.

Also, another datapoint, I have found lately that Windows 10 seems to not play nice with a lot of Android drivers. I had to manually update the “Android Bootloader Interface” and/or “Android Fastboot Interface” drivers every time I attempted to use fastboot, etc. Not sure why.

Anyhow, thank you very much for your help, it seems to be working great so far!

1 Like

Hi there,

now there are 4 Teracube 2e in my family and i am asking myself, how about OTA-updates after rooting the phone?
Is it planned to support that, with the regular android-updates?

Cheers

1 Like

Excellent guide - I was able to root my device successfully without too much trouble. A few things I ran into:

First, I downloaded the latest Android platform tools from Google. However, I kept getting weird errors trying to use adb… it turns out that even though I was running the latest binary, I also had my distribution’s older version installed and there seemed to be some conflict there (some environment variable set wrong, or something). I completely removed the distribution-provided packages and that solved that problem.

Second, as others have noted, the vbmeta-2e-stock.img provided didn’t work and I had to extract it from the stock firmware package.

Third, after flashing Magisk, I rebooted and tried to run the app, but I got an “error parsing package” even after pushing the APK. However, I waited around 10 minutes and the app started working… I guess even after adb install finishes, it takes a while for the installation to actually complete.

Maybe this stuff is obvious to Android wizards, but hopefully it helps someone…

2 Likes

When I boot into twrp I can’t see my sdcard (external) or usb type-c stick. Can you confirm this? Can anyone tell me if it’s realistic to fix this?

2 Likes

I’m sorry i don’t have an answer to that, but isn’t it possible to just copy whatever you want to flash to the internal memory once you’re in TWRP? This has always worked for me.

Struggling with the last step (getting Magisk to launch). I’ve gone through the entire process twice and receiving the same results. I can see the Magisk app on the home screen, click on it and receive the message “Upgrade to full Magisk to finish the setup. Download and install?” I select OK but then after a couple of seconds get an error of “There was a problem parsing the package.”

Like others (@Ylvinzk, etc.), I didn’t have any success with the vbmeta-2e-stock file so used the vbmeta file from the stock firmware, but otherwise directions were followed exactly. I’ve gone through the Troubleshooting steps to no avail. Even waited 10+ minutes like @Thomas noted in his feedback.

Any help would be so appreciated! This is my first go at rooting a device and am really looking forward to learning and experimenting.

Update: Magisk manager has been merged into Magisk. Download it from github.

Hello

I would suggest you to download and install magisk manager from github.
And then follow the instructions.